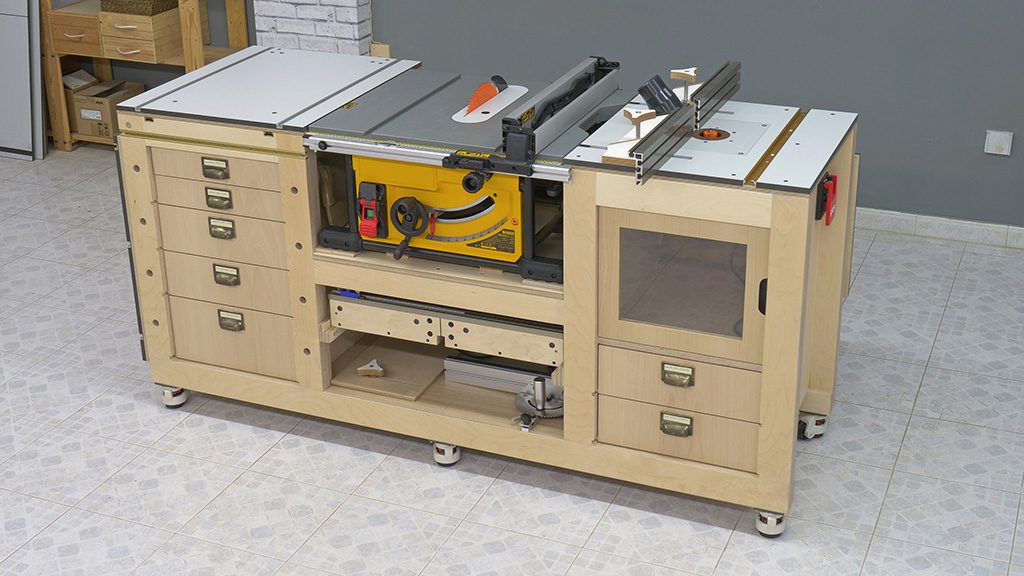

Alright, let's build a sweet workbench that'll hold your table saw and router like a boss. This ain't your grandma's sewing table â€" we're talking serious woodworking power!
Why build a workbench?
Stability: You want your table saw to be steady as a rock, not wobbling like a drunkard. A sturdy workbench makes for precise cuts.
Organization: Let's face it, woodworking tools can be a mess. A workbench with storage keeps everything neat and within reach.
Versatility: You can use it for tons of stuff â€" sanding, gluing, assembly, you name it!
Pride of Ownership: Building your own workbench is awesome. Plus, you'll know exactly how it was built.
How to build a workbench
Materials:
Lumber: Go for hardwood like maple, oak, or cherry for durability. You'll need 2x4s, 2x6s, plywood, and maybe some 1x4s for trim.
Fasteners: Wood screws, pocket hole screws, and glue.
Work surface: This is where you'll be cutting! Consider MDF, plywood, or even solid wood like butcher block.
Casters or legs: Decide whether you want your workbench on wheels or fixed to the floor.
Table saw and router: You'll need these to build the workbench!
Steps:
1. Design and Planning:
Figure out the dimensions you need. Consider the size of your tools, the space you have, and how much weight you'll be putting on it.
Sketch a rough plan. You don't need fancy CAD software, just a pencil and paper to visualize the parts.
2. Cut the Lumber:
Use your table saw to rip the lumber to the sizes you need. Make sure to use a sharp blade and cut slowly and accurately.
Double-check measurements!
3. Assemble the Frame:
Start with the base â€" this is what will hold the weight. Use 2x4s for the legs and 2x6s for the rails connecting them.
Make sure the base is square and level. You can use a speed square or a level to check.
Glue and screw the joints together. Don't be afraid to use plenty of screws for strength!
4. Add the Top:
Now it's time for your work surface. Screw or glue the plywood to the top of the frame.
You might want to use a router to create a lip around the edge of the plywood for a more finished look.
5. Add Storage:
Build in drawers, shelves, or cabinets for your tools.
This is a great opportunity to get creative and personalize your workbench.
6. Install Your Tools:
Figure out the best spot for your table saw and router.
You might need to build special platforms or supports to mount them securely.
Remember, you need to be able to use your tools comfortably and safely!
7. Finishing Touches:
Sand down the entire workbench, paying attention to the corners and edges.
Apply a finish â€" paint, stain, or oil â€" to protect the wood and give it a nice look.
Things to Keep in Mind:
Safety First: Always wear safety glasses and ear protection while working with power tools.
Dust Collection: Make sure you have a good dust collection system in place to keep your workspace clean and healthy.
Ergonomics: Design the workbench to be comfortable to use. You'll be spending a lot of time at it!
Flexibility: Think about how you can make your workbench adaptable to different tasks in the future.
Here's a little extra to get you pumped about building your workbench:
You'll Learn: This is a great project to learn about woodworking. You'll gain experience with measuring, cutting, assembling, and finishing.
You'll Save Money: Building your own workbench is usually cheaper than buying a pre-made one.
You'll Have a Unique Creation: No two workbenches are exactly alike. Yours will be a reflection of your style and needs.
So there you have it! Build a workbench that's as cool as your woodworking skills. You'll be the envy of the neighborhood (and maybe your dad) when you show off your handiwork. Happy building!
No comments:
Post a Comment